A Practical Guide to Bathroom Remodel Plans That Work
- Feb 4
- 16 min read
Every great bathroom remodel starts with two simple things: a tape measure and a clear head. Before you get lost in tile samples and fancy fixtures, you need to accurately measure your space and get honest about your must-haves versus nice-to-haves. This is the single most important step. It’s what turns a vague dream into a real, workable plan, saving you from a world of expensive changes and regret down the road.
Starting Your Bathroom Remodel Plan the Right Way
It’s an exciting time to be remodeling. You’re joining millions of other homeowners who are pouring money and love back into their homes. In fact, the homeowner remodeling market jumped by a massive 26.6% between 2021 and 2022 alone. Experts predict the kitchen and bath industry will be a $235 billion business by 2025, so you're definitely in good company.
But turning that dated, frustrating bathroom into your personal spa doesn't start with demolition. It starts with a solid plan. Without that initial groundwork, you're setting yourself up for blown budgets, agonizing delays, and a final result that just doesn't feel right.
Measure Your Space Accurately
First things first: get to know your bathroom. I mean, really get to know it. Grab a tape measure, a pencil, and some graph paper (or an app on your tablet) and start sketching.
Document Everything: Get the room's precise length and width. Make a note of every door and window, including their size and exact placement. Mark where the toilet, sink, and shower are right now.
Mark Key Utilities: Find every electrical outlet, light switch, and plumbing line. You need to know where water comes in and where it goes out for the sink, toilet, and shower.
Note Obstructions: Don't forget the awkward stuff. Are there vents, radiators, or weird structural columns you have to design around? Put them on the map.
This little sketch becomes your project's bible. It's what stops you from falling in love with a vanity that’s two inches too wide or planning a layout that would cost a fortune to re-plumb.
Assess Your Existing Systems
What you can’t see is often what costs you the most. Before you get too far, you have to investigate the state of your plumbing and electrical systems. Trust me, unexpected surprises behind the drywall are the number one reason bathroom remodel budgets go off the rails.
I see it all the time—homeowners get excited about the beautiful tile and shiny faucets but forget about the guts of the room. A quick inspection from a plumber or electrician can spot old pipes, faulty wiring, or code issues that need fixing.
Finding these problems early means you can build the cost into your budget from the get-go, instead of having a panic-inducing crisis mid-project. For a deeper dive, check out this fantastic homeowner's guide to successful bathroom renovations which covers all these essentials.
Separate Wants from Needs
Now for the fun part. Make two lists: 'Must-Haves' and 'Nice-to-Haves.' This simple exercise is incredibly powerful. It forces you to define your real priorities.
Maybe a walk-in shower is a non-negotiable must-have for accessibility reasons. That heated towel rack you saw on Pinterest? That’s probably a nice-to-have. Having this clarity is a lifesaver when you have to make tough budget calls.
This is also a great point to start playing with ideas. You can use AI Room Design tools to see how different features might actually look in your room. See how you can start transforming your bathroom vision with AI to get a feel for what’s possible.
Getting Real About Your Budget and Timeline
Okay, you've got a vision for your new bathroom. Now comes the part that often trips people up: money and time. Nailing down a realistic budget and timeline is arguably the most critical step in any remodel. It’s what keeps a project feeling exciting and on track, rather than turning into a source of stress and chaos.
Interestingly, bathroom remodels have become the most popular home improvement project, even outpacing kitchens. Most people can expect to spend somewhere between $10,000 and $25,000 for a solid, mid-range update. We're also seeing some cool trends emerge—a whopping 58% of homeowners are ripping out old tub-and-shower combos to create larger 'Super Showers,' and 29% are wisely opting for accessible, low-threshold designs.
Thinking through these initial steps—measuring your space, figuring out what you truly need, and setting priorities—is the bedrock of your entire project.
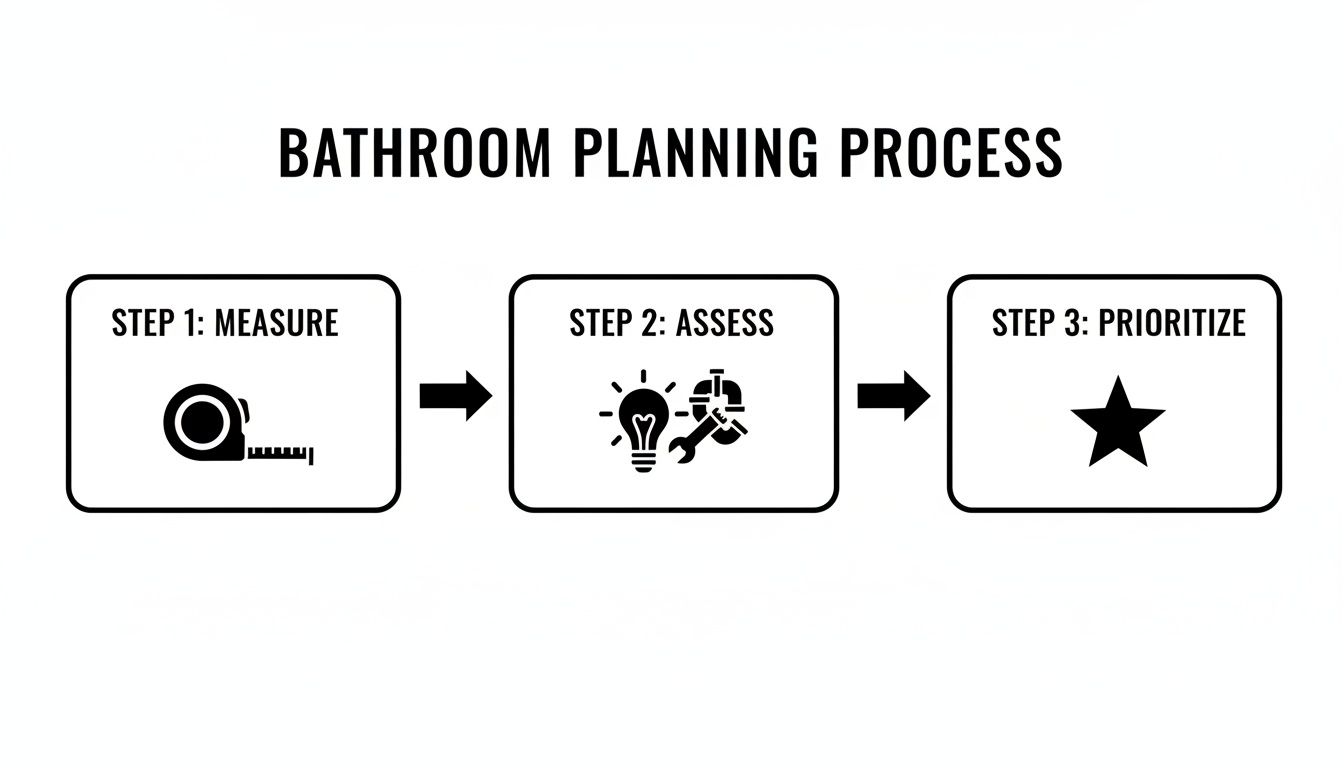
This process isn't just about picking pretty tile; it's a logical flow from understanding the space you have to defining what you want to achieve with it.
Breaking Down Your Remodel Budget
One of the first mistakes I see people make is only budgeting for the big, shiny items like the vanity or a new tub. A truly realistic budget has to cover everything—from the plumber's labor to the drawer pulls that complete the look.
A great way to get started is to think in percentages. This helps you see where the money is really going to go before you start spending.
If I can offer one piece of advice, it's this: always, always set aside a 15-20% contingency fund. This isn't just "extra" money. It's your safety net for the inevitable surprises, like finding old water damage behind a wall or discovering the wiring isn't up to code.
Let's say your total budget is $15,000. A 20% contingency means you'd set aside $3,000 right off the bat, leaving you with $12,000 for all your planned expenses. Trust me, this single step can save your project—and your sanity.
To help you visualize this, here’s a typical breakdown of costs for a mid-range bathroom renovation.
Sample Bathroom Remodel Budget Allocation
This table shows how a typical mid-range bathroom remodel budget is distributed, helping you plan your spending more effectively.
Expense Category | Percentage of Budget | Example Cost (on a $15,000 Budget) |
|---|---|---|
Labor | 20% | $3,000 |
Cabinetry & Countertops | 16% | $2,400 |
Fixtures (Toilet, Sink) | 15% | $2,250 |
Faucets & Plumbing | 14% | $2,100 |
Flooring | 9% | $1,350 |
Lighting & Ventilation | 5% | $750 |
Doors & Windows | 4% | $600 |
Walls & Ceiling | 4% | $600 |
Design Fees | 4% | $600 |
Other/Miscellaneous | 1% | $150 |
Note: These percentages are averages and can shift based on your specific project, location, and the materials you choose.
Mapping Out a Realistic Timeline
Time is just as important as your budget. A full bathroom gut-and-remodel is not a weekend project. It’s a carefully choreographed dance of different tradespeople working in a specific sequence, and it usually takes several weeks.
Understanding the typical order of operations will help you manage your own expectations and know what's happening when.
Demolition and Prep (2-4 days): This is the messy but fast part where everything old comes out—fixtures, tile, drywall, you name it.
Rough-In Work (3-5 days): Once the walls are open, the plumbers and electricians get to work moving pipes and wiring for the new layout. This has to happen before anything gets closed up.
Inspections and Drywall (4-7 days): Your city might require an inspection at this stage. Afterward, new drywall goes up, followed by taping, mudding, and sanding. This part takes time because the compound needs to dry between coats.
Tile and Flooring (3-6 days): Now the fun begins. This is when tile for the floor and shower goes in, followed by grouting and sealing. It’s a detail-oriented job.
Painting and Cabinetry (2-4 days): The walls get painted before the new vanity and any other cabinets are installed. This ensures nice, clean paint lines.
Final Fixture Installation (2-3 days): The grand finale! The toilet, sink, faucets, showerhead, and light fixtures are all installed and connected.
Always remember to build in a buffer week or two. Material backorders and scheduling conflicts happen, so it's smart to plan for them.
Practical Tips for Staying on Track
The key to keeping your remodel plans on schedule is making decisions early. The more you can visualize and finalize your design before the first hammer swings, the smoother everything will go.
This is where an AI Home Design tool can be a game-changer. Instead of trying to imagine how different tiles or vanity styles will look, you can actually see them in your space. Finalizing your design upfront means you can order all your materials before demolition even starts, which is the best way to avoid those dreaded "waiting on the tile" delays.
Tools like Decor8 let you play with layouts and finishes easily. You can check out the pricing for these powerful AI tools to see how affordable it is to add this kind of certainty to your project planning.
Designing Your Layout and Choosing Materials
Once you’ve nailed down your budget and timeline, you get to dive into the fun part: designing the space. This is where the vision for your bathroom remodel really starts to take shape, moving from abstract numbers to concrete decisions about how the room will look, feel, and function.
The choices you make now will set the tone for your daily routine for years to come. It’s no surprise the global bathroom remodeling market is booming. Valued at roughly USD 412.8 billion in 2025, the industry's growth shows just how much people want to create personalized, relaxing spaces at home. With projections hitting nearly USD 593.7 billion by 2035, it's clear that thoughtful layouts and beautiful materials are top priorities.
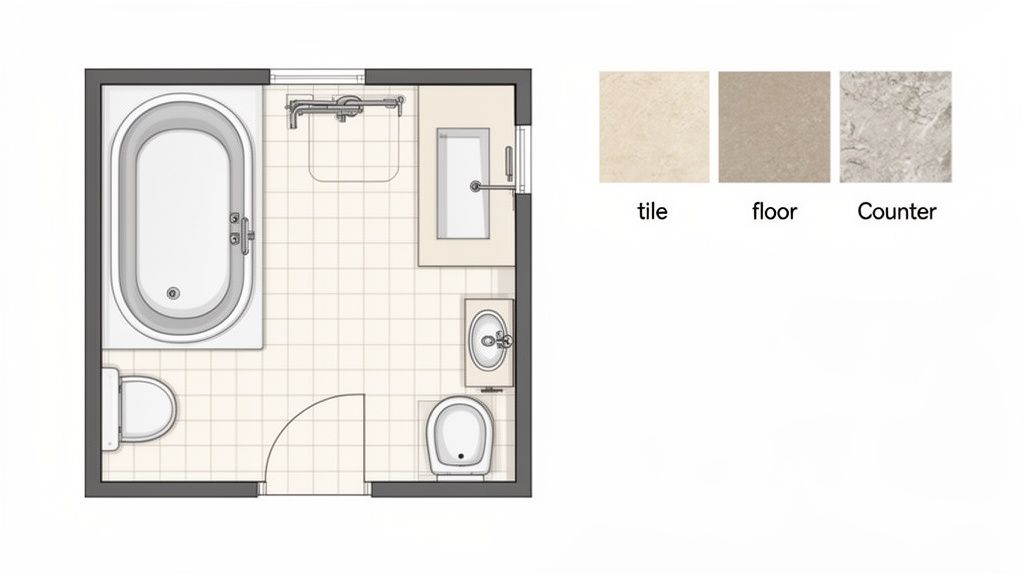
Mapping Out a Functional Bathroom Layout
Think of your layout as the skeleton of your new bathroom. Getting this right from the start is absolutely critical. Why? Because moving major plumbing lines is one of the quickest ways to blow your budget.
Sticking with your bathroom’s existing footprint is almost always the cheapest route. But sometimes, a total reconfiguration is the only way to get the functionality you need.
Here are a few common approaches I see:
Three-in-a-Row: This is a classic for a reason. Placing the sink, toilet, and tub/shower along a single "wet wall" is incredibly efficient for small and mid-sized bathrooms. It keeps the plumbing simple and leaves you with more open floor space.
Split Layouts: If you’re working with a larger master bathroom, you have more flexibility. A split layout might feature vanities on one wall and the shower or tub on another, creating separate zones that feel more spacious and organized.
The Toilet's Place: Here’s a pro tip: if you can, avoid making the toilet the first thing you see when you walk in. Tucking it next to the vanity or even behind a small half-wall can instantly make the whole room feel more elegant.
One of the most common mistakes I see homeowners make is forgetting the little details of daily life. Always check your clearances. Will the vanity drawers hit the shower door? Is there enough elbow room around the toilet for comfort and cleaning? Walk through the motions in your head.
And don’t forget ventilation! Good airflow is non-negotiable for preventing mold and mildew. As you plan the layout, think about where to place an exhaust fan. This guide on bathroom exhaust fan installation has some great technical pointers to consider early on.
Selecting Materials for Durability and Style
Now comes the part everyone loves—picking the finishes that bring your style to life. This is a balancing act between the look you want, the budget you have, and the maintenance you’re willing to do.
A great way to avoid expensive mistakes is to use an AI Home Design tool to visualize your choices. Instead of just crossing your fingers that the tile you love will match the vanity, you can see it all together in a realistic preview of your room. You can even test paint shades from major brands with a paint color visualizer before a single drop goes on the wall.
Material Comparison: Flooring
Material | Pros | Cons | Best For |
|---|---|---|---|
Porcelain Tile | Extremely durable, water-resistant, huge variety of styles | Cold underfoot, can be slippery when wet | High-traffic bathrooms, achieving a spa-like feel |
Luxury Vinyl (LVT/LVP) | 100% waterproof, warmer feel, easy DIY installation | Can be punctured, lower resale value than tile | Budget-friendly projects, busy family bathrooms |
Natural Stone | Unmatched beauty, adds high-end value | Porous (needs sealing), expensive, can stain | Luxury master baths, making a statement |
For shower walls, I’m a big fan of large-format porcelain tiles. They dramatically reduce the number of grout lines you have to scrub. As for countertops, quartz remains a top contender. It gives you the look of natural stone without the fuss, thanks to its non-porous and stain-resistant surface.
By choosing each piece thoughtfully, you’ll create a bathroom that not only looks stunning when it’s finished but also holds up beautifully over time.
Bringing Your Vision to Life with AI Home Design
You've got the layout nailed down and a shortlist of materials you love. But now comes the hard part: picturing how it all fits together. Will that beautiful tile you picked out clash with the vanity? Is that bold paint color going to feel overwhelming once it's actually on the walls? This is where doubt creeps in, and it's a notorious project killer.
For years, we relied on tiny samples, mood boards, and a whole lot of wishful thinking. Not anymore. Technology has finally caught up, giving us a powerful tool to bridge the gap between imagination and reality.
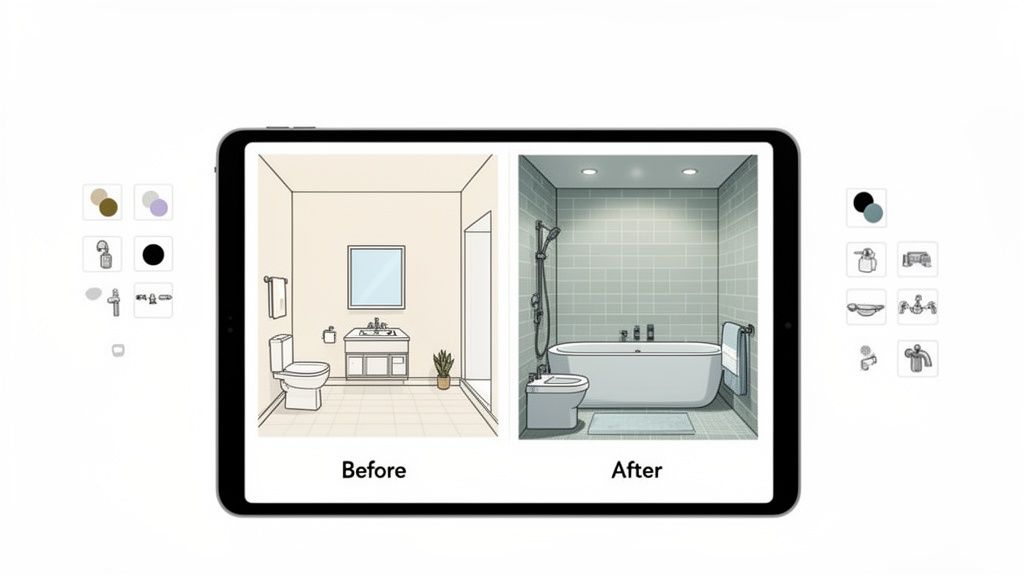
This is a perfect example from Decor8.ai. You can take a photo of your current bathroom and instantly see what it would look like with a completely new style. This isn't just a neat trick; it's about giving you the confidence to make big decisions—from tile to faucets—before a single dollar is spent on materials.
Visualize Changes Instantly
The real magic of using an AI Home Design tool is the speed. Instead of guessing how a different floor tile might look, you can generate a photorealistic image of it installed in your actual bathroom in just a few seconds.
It completely removes the guesswork. You just upload a picture of your space and let the AI do the heavy lifting.
Experiment with Tile: Want to see if a classic subway tile or a bold geometric pattern works better? Now you can compare them side-by-side on your own shower walls.
Test Paint Colors: Virtually paint your walls with real colors from brands like Sherwin-Williams or Benjamin Moore and see how they look in your room's unique lighting.
Swap Out Fixtures: Instantly see the impact of switching your tired chrome faucets to modern matte black or elegant brushed gold.
This is more than just playing with colors; it's a crucial planning step. I can't tell you how many homeowners I've talked to whose biggest regret was picking a material that looked completely different in their home than it did in the showroom. An AI visualizer helps you dodge that common and costly mistake.
"Being able to see the final look before we even started demolition was a game-changer. We shared the AI renders with our contractor, and for the first time, we felt like everyone was on the exact same page. It eliminated so much stress."
From Idea to Actionable Plan
AI design tools aren't just for daydreaming; they create real, tangible assets for your project. Once you land on a design you absolutely love, you can download high-resolution, photorealistic images that become a cornerstone of your bathroom remodel plans.
These visuals are incredibly practical and serve a few key purposes:
Clear Contractor Communication: It's one thing to describe your vision; it's another thing entirely to hand your contractor a photo of the finished product. It eliminates any misinterpretation of tile patterns, grout color, or fixture placement.
Shopping Confidence: Take the renders with you to the store. They act as your guide, helping you stay focused and find the exact materials that bring your confirmed vision to life.
Personal Reassurance: Let's be honest, remodeling is messy. Having that beautiful "after" picture reminds you what all the dust and disruption is for, keeping you motivated through the tough parts.
By adding this step, you turn a collection of ideas into a clear, visual blueprint. If you want to see just how easy it is to get started, you can learn more about how to visualize your home before a renovation. It’s a simple way to ensure the bathroom you end up with is the one you’ve been dreaming of all along.
Managing Permits, Contractors, and Construction
With your design locked in and materials on the way, the project starts to feel real. Now it’s time to move from the drawing board to the construction zone. This is where your carefully laid plans meet the realities of demolition and building, and navigating it successfully comes down to managing the process—and the people—with a steady hand.
First thing's first: the dreaded building permit. Don't even think about skipping this. It’s a legal requirement that ensures your project is safe and up to code, and ignoring it can result in huge fines or major problems when you try to sell your home down the road.
Do You Actually Need a Permit?
Almost always, yes. If you’re moving walls, changing the bathroom’s footprint, or touching any plumbing or electrical systems, you’ll need a permit. The only time you can usually get away without one is for simple cosmetic updates, like painting the walls or swapping out a faucet.
A quick call to your local building department is the easiest way to get a straight answer. They'll tell you exactly what you need for your project and give you the right forms. Trust me, it’s far better to ask now than to get a stop-work order slapped on your door mid-project.
Assembling Your Remodel Dream Team
Let's be honest, a full bathroom gut job is rarely a one-person DIY project. It takes a coordinated team of skilled professionals, each playing a crucial role at just the right time. Knowing who does what is key to hiring well.
General Contractor (GC): Think of the GC as the quarterback of your project. A good one coordinates every other trade—plumbers, electricians, tilers—and manages the schedule, pulls the permits, and acts as your single point of contact. For any complex remodel, a GC is worth their weight in gold.
Plumber: This is non-negotiable. For moving water supply lines, drains, or installing critical fixtures like a new toilet or shower valve, you need a licensed plumber. One bad pipe connection can lead to a catastrophic leak and thousands in water damage.
Electrician: Just like with plumbing, all wiring requires a licensed electrician. They’ll handle everything from adding new outlets and installing code-required GFCI protection near sinks and tubs to wiring for new lighting and exhaust fans.
Finding great pros takes some legwork. Start by asking friends for recommendations, then hit up online review sites. Most importantly, always verify that they have a current license and are fully insured. Hiring someone without insurance is a massive financial risk you don't want to take.
Get at least three detailed bids before signing any contract. Make sure every contractor is bidding on the exact same scope of work so you can make a true apples-to-apples comparison. The cheapest bid often isn't the best—look for clear communication, professionalism, and a track record you can trust.
Key Questions to Ask Every Contractor
Once you’ve got a short list, it’s time for interviews. The answers they give to these questions will tell you everything you need to know about their experience and reliability.
Are you licensed and insured in my city? (And can I see a copy?)
Can you give me a list of recent references I can call?
Will you be on-site personally, or will you assign a project manager?
What does your payment schedule look like? (Big red flag if they ask for it all upfront.)
How do you handle change orders when surprises pop up?
What’s the estimated timeline, and what happens if there are delays?
Do you offer a warranty on your workmanship?
Their responses will help you feel out who you’ll work best with and who you can truly trust to bring your vision to life.
Navigating the Dust and Decisions
With your team locked in, communication is everything. This is where the realistic renders you created with an AI Home Design tool become invaluable. Instead of trying to describe what you want, you can show your contractor a crystal-clear image of the final product, eliminating any confusion over tile patterns or fixture placement.
Set up regular check-ins to walk through the progress and tackle any issues that arise. Remodels rarely go 100% according to plan; what separates a good contractor from a bad one is how they handle the unexpected. They should come to you with solutions, not just problems.
Finally, before that last check is written, do a meticulous final walkthrough. Turn on every faucet, flip every switch, and check every outlet. Inspect grout lines, look for nicks or scratches, and make sure every drawer and door opens smoothly. Create a final "punch list" of any little things that need fixing, and don't sign off until you're completely happy.
Answering Your Top Bathroom Remodel Questions
Even the most buttoned-up plan sparks a few questions. This is completely normal! We've been through this process countless times, and we've found that homeowners tend to run into the same uncertainties.
Let's clear up some of the most common questions that pop up during the planning stage.
How Long Does a Typical Bathroom Remodel Take?
It’s easy to underestimate the timeline. While a quick cosmetic refresh can be a weekend project, a full-scale renovation is a different story. For a complete, down-to-the-studs remodel, you should realistically plan for three to eight weeks.
Simple cosmetic work—think painting, swapping a vanity, or updating faucets—might take just a few days to a week.
A full gut job that involves moving plumbing, rerouting electrical, detailed tile work, and waiting on inspections can easily stretch to two months or more.
The final timeline really hinges on the project's scope, the lead time for your materials (custom vanities can take weeks!), and your contractor's schedule.
What Is the Best Order of Operations for a Remodel?
Working in the right sequence is everything. It saves you from headaches and costly do-overs. While every job has its own quirks, the pros follow a pretty standard playbook.
Demolition: It all starts here. Everything old—fixtures, tile, drywall—gets cleared out.
The "Rough-In": With the walls open, plumbers and electricians get to work moving pipes and wires.
Inspections & Drywall: After the rough-in passes inspection, the new drywall goes up, followed by taping and mudding.
Tile and Flooring: Now the fun begins. The floor and shower walls are tiled, grouted, and sealed.
Painting: It’s much easier to paint now, before the big fixtures get in the way. This ensures clean, crisp lines.
Cabinetry and Countertops: The new vanity and any other storage units are installed.
Final Fixture Installation: In go the toilet, sink, faucets, and shower trim. Everything gets hooked up.
Final Electrical: Light fixtures, switches, and outlets are installed and made live.
Finishing Touches: Finally, the mirrors, towel bars, and other accessories go in to complete the look.
DIY vs Pro Task Suitability
Deciding what to tackle yourself versus hiring a pro is a huge part of managing your budget and timeline. Here’s a quick guide to help you make the call.
Task | Recommended for DIY? | Key Considerations |
|---|---|---|
Demolition | Maybe | Fun, but know when to stop. Avoid damaging hidden pipes or wiring. |
Plumbing | No | Requires a licensed professional. Mistakes can lead to major water damage. |
Electrical Work | No | Always hire a licensed electrician. This is a serious fire and safety risk. |
Painting | Yes | A classic DIY task. Patience and good prep work are all you need. |
Tiling | Maybe | Small, simple jobs can be DIY. Large formats or complex patterns are best for pros. |
Installing a Vanity | Yes | If you're comfortable with basic plumbing hookups and leveling. |
Installing a Toilet | Yes | Surprisingly straightforward, but get the wax ring seal right! |
Ultimately, be honest about your skill level and the tools you have. When in doubt, hiring a professional for critical tasks like plumbing and electrical is always the smartest, safest investment.
Can AI Interior Design Tools Really Help with Planning?
They absolutely can. In fact, using an AI Interior Design tool is one of the smartest moves you can make during planning. It helps you conquer the biggest fear in any remodel: uncertainty.
Think about it: a tool like Decor8 AI lets you see different layouts, materials, and paint colors in your actual room before you spend a dime. It’s the best way to avoid that sinking feeling when the tile you loved in the showroom looks totally wrong in your home's lighting.
You can generate incredibly realistic images to show your contractor, making sure you're both on the exact same page. For a deeper dive into the technology, you can explore our comprehensive FAQ page.
What Are the Most Common Hidden Costs?
No matter how carefully you plan, remodeling an old bathroom almost always unearths a few surprises. The most common hidden costs tend to reveal themselves once the walls come down.
Water Damage: It's incredibly common to find mold, mildew, or rotted subflooring and studs behind old showers and under toilets.
Outdated Systems: A contractor might discover old plumbing or knob-and-tube wiring that isn't up to modern building codes and legally must be replaced.
Permit and Disposal Fees: These are easy to overlook. Don't forget to budget for the cost of permits and the dumpster or fees for hauling away all the debris.
This is precisely why every experienced remodeler will tell you to add a 15-20% contingency fund to your budget. It's the safety net that turns a potential project-killing disaster into a manageable problem.
Ready to stop guessing and start seeing? With Decor8 AI, you can upload a photo of your bathroom and watch your ideas come to life in seconds. Play with different styles, test out paint colors, and create photorealistic images to share with your contractor—all before the real work begins.
Comments